|
This video was produced by the US
Army as a training aid for their medics.
It shows how to apply a plaster cast
to an injured forearm, and how to safely remove it..
The video clip may be freely
downloaded.
|
In applying any cast, the basic materials are the
same: webril or cotton bunting, plaster of Paris, a bucket or basin of
tepid water, a water source (tap water), protective linen, gloves, a
working surface, a cast saw, and seating surfaces for the patient and
the corpsman. Some specific types of casts may require additional
material.
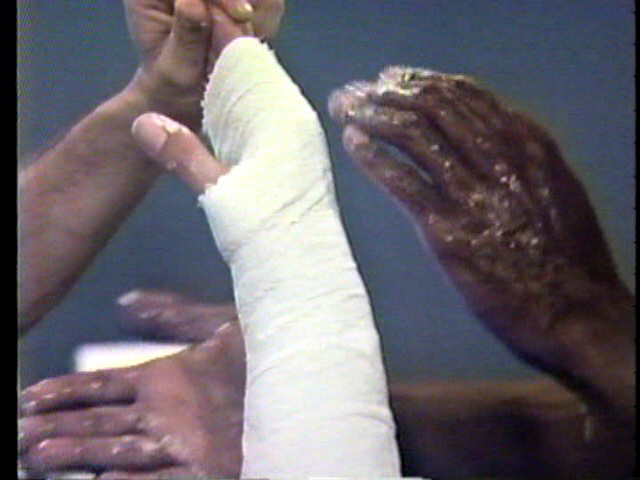
Short-Arm Cast - A short-arm cast
extends from the metacarpal-phalangeal joints of the hand to just
below the elbow joint. Depending on the location and type of fracture,
the physician may order a specific position for the arm to be casted.
Generally, the wrist is in a neutral (straight) position with the
fingers slightly flexed in the position of function.
Beginning at the wrist, apply three
layers of webril. Then apply webril to the forearm and the hand,
making sure that each layer overlaps the other by a third as shown in
figure 5-4. Check for lumps or wrinkles and correct any by
tearing the webril and smoothing.
The plaster of Paris is then dipped
into the water for approximately 5 seconds. Gently squeeze to remove
excess water, but do not wring out. Beginning at the wrist (fig.
5-4C) wrap the plaster in a spiral motion overlapping each
layer by one-third to one-half. Smooth out the layers with a gentle
palmar motion. When applying the plaster, make tucks by grasping the
excess material and folding it under as if making a pleat. Successive
layers cover and smooth over this fold. When the plaster is anchored
on the wrist, cover the hand and the palmar surface before continuing
up the arm (figs.
5-4D and 5-4E). Repeat this process until the cast is thick
enough to provide adequate support, generally 4 to 5 layers. The final
step is to remove any rough edges and smooth the cast surface. The
ends of the cast are turned back and covered with the final layer of
plaster, and the plaster is set for approximately 15 minutes and then
trimmed with a cast saw as needed.
From the Hospital Corpsman HM3 and 2 Manual |
